Materials:
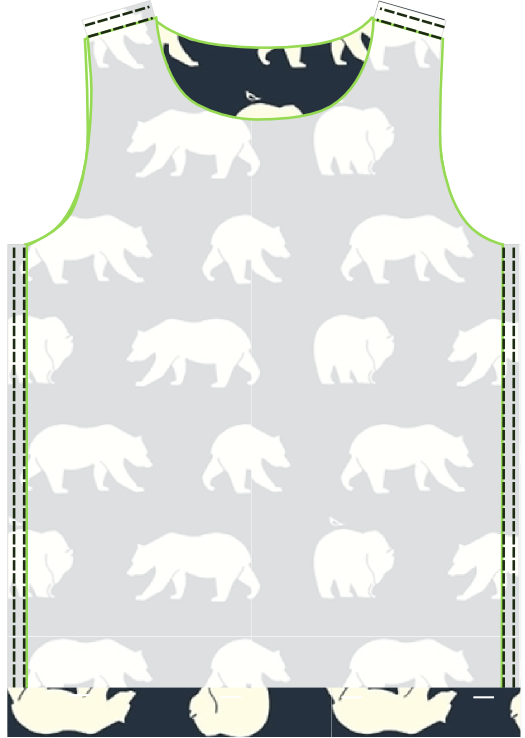
Knit fabric - Birch fabrics - Bear Camp (
fabric width: 112 cm)
50 cm x 80 cm
(size 6 months - 5Y)
80 cm x 100 cm
(size 5Y - 15Y)
Instructions:
Download the free sewing pattern from the list below.
(
EU size 68) (
US 6 months)
(
EU size 74) (
US 9 months)
(
EU size 80) (
US 12 months)
(
EU size 86) (
US 18 months)
(
EU size 92) (
US 2T)
When working with knits, it is important not to stretch or pull the
fabric while sewing. Also use a stretch needle and a stretch stitch. In
this pattern all seams are sewed with a twin needle.
Double-click images to enlarge.
 |
| Step 1: Draw the pattern. |
Print the sewing pattern in landscape mode at 100% on A4 paper or US
Letter. The pattern is without seam allowance. Add 1 cm (5/8 inch) seam
allowance. Add 2 cm (1 inch) seam allowance at the bottom of the tank top. Draw the armholes and the neckline without seam allowance.
 |
| Step 2: Cut the fabric. |
Cut a front piece and a back piece out of the fabric.
 |
| Step 3: Pin front piece to back piece. |
With right sides facing, pin down the front piece to the back piece.
 |
| Step 4: Sew the sides of the tank top and the shoulder seams. |
Sew the sides of the tank top and the shoulder seams.
 |
| Step 5: Fold the seam allowance to the inside. |
Fold the seam allowance of the bottom of the tank top to the inside and pin down.
 |
| Step 6: Sew the hem in place. |
Turn right-side out. Sew the hem in place. Sew about 1,5 cm (5/8 inch) from the outer edge.
 |
| Step 7: Sew neckband. |
Cut a strip of fabric out of the ribbing fabric (4,5 cm - 2 inch wide). Align the
raw edges of the neckband with the raw edge of the neck opening, wrong
sides together. Sew 1 cm (1/2 in) from the outer edge. Stretch the
neckband while you sew, but be careful not to stretch or pull the
singlet fabric.
 |
| Step 8: Sew neckband. |
Fold the neckband over the cut edge, re-fold and pin down. Sew.
 |
| Step 9: Add armhole ribbing. |
Align the
raw edges of the ribbing with the raw edge of the armhole, wrong
sides together. Sew 1 cm (1/2 in) from the outer edge. Stretch the ribbing while you sew, but be careful not to stretch or pull the
singlet fabric.
 |
| Step 10: Add armhole ribbing. |
Fold the ribbin over the cut edge, re-fold and pin down. Sew.
© small dreamfactory
not intended for commercial use


 Free sewing patterns for girls


No comments:
Post a Comment