Materials:
* Knit fabric (
Liandlo/
Znok/
Spoonflower/
Alice Apple) - 40 cm x 30 cm (16 inch x 12 inch)
* Foldover elastic - 2,5 cm x 50 cm (1 inch x 20 inch)
Instructions:
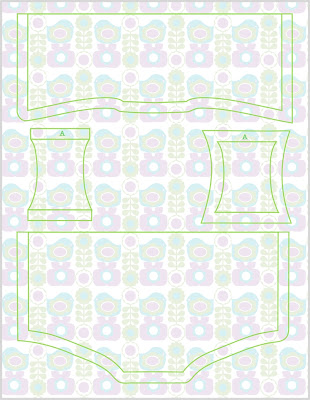
Download the free sewing pattern from the list below. Set your printer settings to A4 paper.
Girls briefs (size 86 / 92) (
US 18 months/ 2T)
Girls briefs (size 104) (
US 4Y)
Girls briefs (size 110 / 116)
(
US 5Y/ 6Y)
Girls boxer briefs (size 98/104) (
US 3T/ 4Y)
Girls boxer briefs (size 1110/116) (
US 5Y/ 6Y)
Girls boxer briefs (size 122/128) (
US 7Y/ 8Y)
Girls boxer briefs (size 134/140) (
US 9Y/ 10Y)
Girls boxer briefs (size 146-152) (
US 11Y/ 12Y)
Girls boxer briefs (size 158/164) (
US 13Y/ 14Y)
For the girls boxer briefs follow
these instructions.
When working with knits, it is important not to stretch or pull the fabric while sewing. Also use a stretch needle and a stretch stitch. In this tutorial all seams are sewed with a twin needle.
Double-click images to enlarge.
 |
| Step 1: Draw the pattern. |
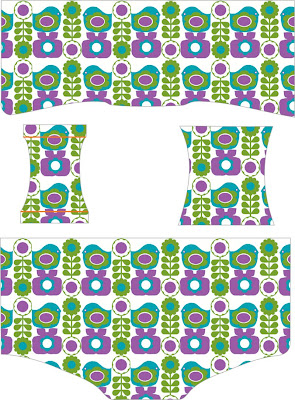
Draw the pattern with an aqua trickmarker on the back of the fabric. The pattern is without seam allowance. Add 1 cm (5/8 inch) seam allowance. Draw the top of the underpants and the sides of one bottom piece without seam allowance.
Cut a front piece, a back piece and two bottoms out of the fabric.
 |
| Step 2: Draw two lines with an aqua trickmarker. |
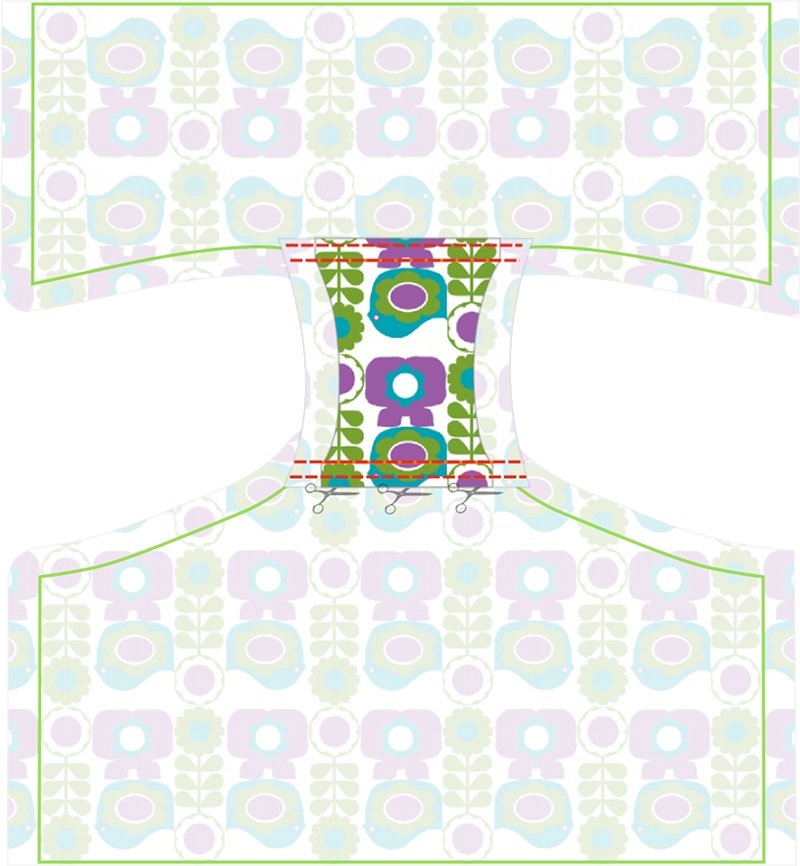
Draw on the front of one bottom piece two lines (marked orange) with an aqua trickmarker. These are the same lines as at the back of the fabric.
 |
| Step 3: Pin together. |
Pin the two bottom parts together with wrong sides facing. Do not pin on the sewing line, but about 1 cm (1/2 inch) above and beneath the sewing line (marked orange).
 |
| Step 4: Pin the bottom pieces to the front piece. |
With right sides facing, pin the bottom pieces to the front piece (on sewing line).
 |
| Step 5: Sew together. |
Sew together.
 |
| Step 6: Trim. |
Trim. Place the underpants right-side down on your work surface.
 |
| Step 7: Pin the bottom pieces to the back piece. |
With right sides facing, pin the bottom pieces to the back piece (on sewing line).
 |
| Step 8: Sew together. |
Sew together.
 |
| Step 9: Trim. |
Trim. Place the underpants right-side down on your work surface.
 |
| Step 10: Sew the sides. |
Pin the front piece to the back piece, with right sides facing. Sew the sides of the underpants. Trim.
 |
| Step 11: Fold the seam allowance to the inside. |
Fold the seam allowance of the leg holes to the inside and pin down.
 |
| Step 12: Sew leg holes. |
Turn your underpants right side out. Sew leg holes about 1 cm (5/8 inch) from the outer edge. Trim.
 |
| Step 13: Fold the foldover elastic in half. |
|
With right sides facing, fold the foldover elastic in half. Make a circle with a circumference of 38 cm (15 inch) for size 24 months/2T, 39 cm (15,4 inch) for size 3T/4Y or 41 cm (16,1 inch) for size 5Y/6Y. Sew together.
 |
| Step 14: Sew. |
With wrong sides facing, pin the foldover elastic to the underpants. Fold the foldover elastic in half length-wise, over the edge of the underpants and pin down. Sew together.
© small dreamfactory
not intended for commercial use


 Free sewing patterns for girls
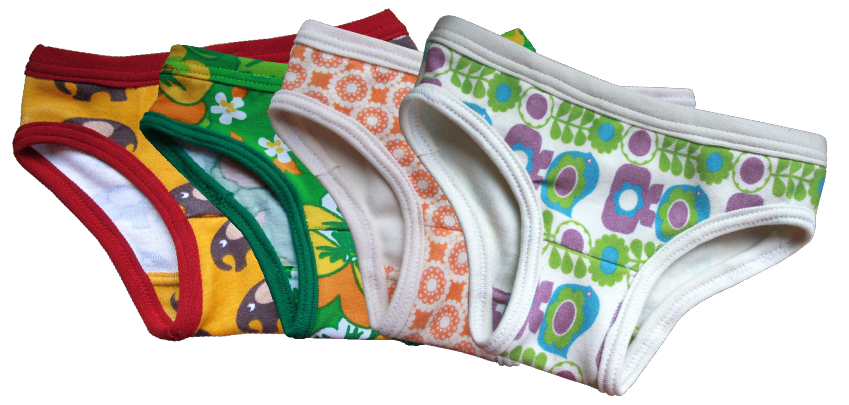
)


hello,
ReplyDeleteis the underwear pattern only for girls?
Unfortunately underwear for boys need to be a little different at the front :)
ReplyDeletehej there :)
ReplyDeletethese are so sweet! i'm about to start on the first one just now and am excited to see the product!
another thing: does anyone know where to find an equally beautiful pattern for boys briefs?
well, a big thanx for sharing and all the best!
german freebook (with foto's showing the single steps) for boy's briefs: http://nicibiene.blogspot.nl/2013/01/welcome-2013-freebook-fur-euch.html.
ReplyDeleteYou have to add allowances, except for the leg holes.
I don´t understand, the pdfpatterns does not look the same as the pattern that you are showing here? Look at the frontpiece...
ReplyDelete//swofia
Hi Swofia, because this tutorial is nearly the same as the tutorial for the women's briefs, I converted the tutorial for the women's briefs into a tutorial for sewing kids underwear. I didn't change the shape of the pattern, therefore the tutorial doesn't match with the pdf-pattern.
DeleteThese are amazing! I love the way my fabric design works with the 1970s style underwear...thanks for using my fabric :) :) x
ReplyDeleteThe pictures at the top appear to use FOE for the legs. If I do use FOE for the legs should I leave the seam allowance for the legs off. Similar to the waistband?
ReplyDeleteNo, you just fold it over the edge. I used jersey at the pictures above (not recommended).
DeleteOh I would love a pattern for boys too... Hint hint. Thanks for a great blog and great patterns.
ReplyDelete